Conservation and Restoration of Paintings
In the conservation studio, Marjan de Visser starts each treatment of a painting with a personal conversation with the owner. Of course the owner knows a lot to tell about his painting. That is why this personal conversation is so important. The restorer then tells what she sees about the painting. But also what she hears and smells. For example, a covered painting sounds hard and hollow. And a smoked painting smells like nicotine. A small test may follow after this conversation. This is to demonstrate the dirt of the varnish. Naturally Marjan de Visser takes all the time for this conversation. Usually with a cup of tea or coffee!
Plan of action
When the customer decides to let his painting restored … the intake form follows. The painting is paced safe in the chest of drawers. The treatment plan is the first step. Photography from the front and back, using daylight and UV fluorescence. Infrared if necessary. Usually the restorer also takes digital microscope photos.

Research
The restorer studies the painting on the front and back in daylight and UV fluorescence. And preferably also under the microscope. The restorer certainly also examines the construction and the support. Where was the painting painted on? Is this on a linen or on a panel. Possibly even on a different material. And what paint did the painter use. Was this oil paint, acrylic paint or perhaps casein. Quite often a painting has a layer of varnish. Of course, the restoration history is important too. Because often a painting has been treated before. Cleaning and varnish removal tests are carried out. Finally sufficient information has been collected to draw up a treatment plan.

When restoring a painting consider:
- The fabric of the linen on the back that will be removed. But also apply a protection on the back to prevent damage and pollution.

- Painting restoration also includes cleaning of both varnished and unvarnished layers of paint. Think of dust, splashes, nicotine deposits, insect secretion.
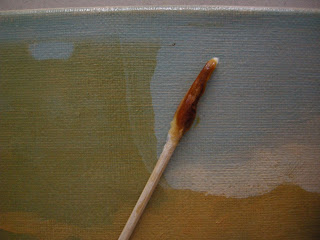
- During restoration of paintings the restorere often removes the aged and yellowed layer of varnish.

- Common found damage is the delamination of the paint layer. If the flaking paint is likely to come off, a consolidation is executed. Both natural and synthetic adhesives are an options.

- Thinking of the losses in the paint layer. A filler with the right structure makes it complete again. The retouch is the ‘finishing touch. The filler is homemade specifically for each painting.
- Conservation and restoration of paintings also includes repairing tears in the linen. A repair can be done by stabilizing the tear with “der Trecker”. Another option is to weld the wires with the hot needle. It is also sometimes possible to suture the tear with a surgical needle and thread.
- When conservring and restoring paintings, relocation is sometimes the right choice to save the artwork. One option is to cover the painting with a cold doubling technique under low vacuum. A double cloth is pre-treated with an adhesive – Mist Lining. During the process, the glue is reactivated with a solvent and the adhesion between both cloths is established.
- When conservering paintings, the last step is often varnishing. When applying varnishes, the restorer chooses from a large amount of (self-made) stable synthetic varnishes with the addition of a UV filter.
